
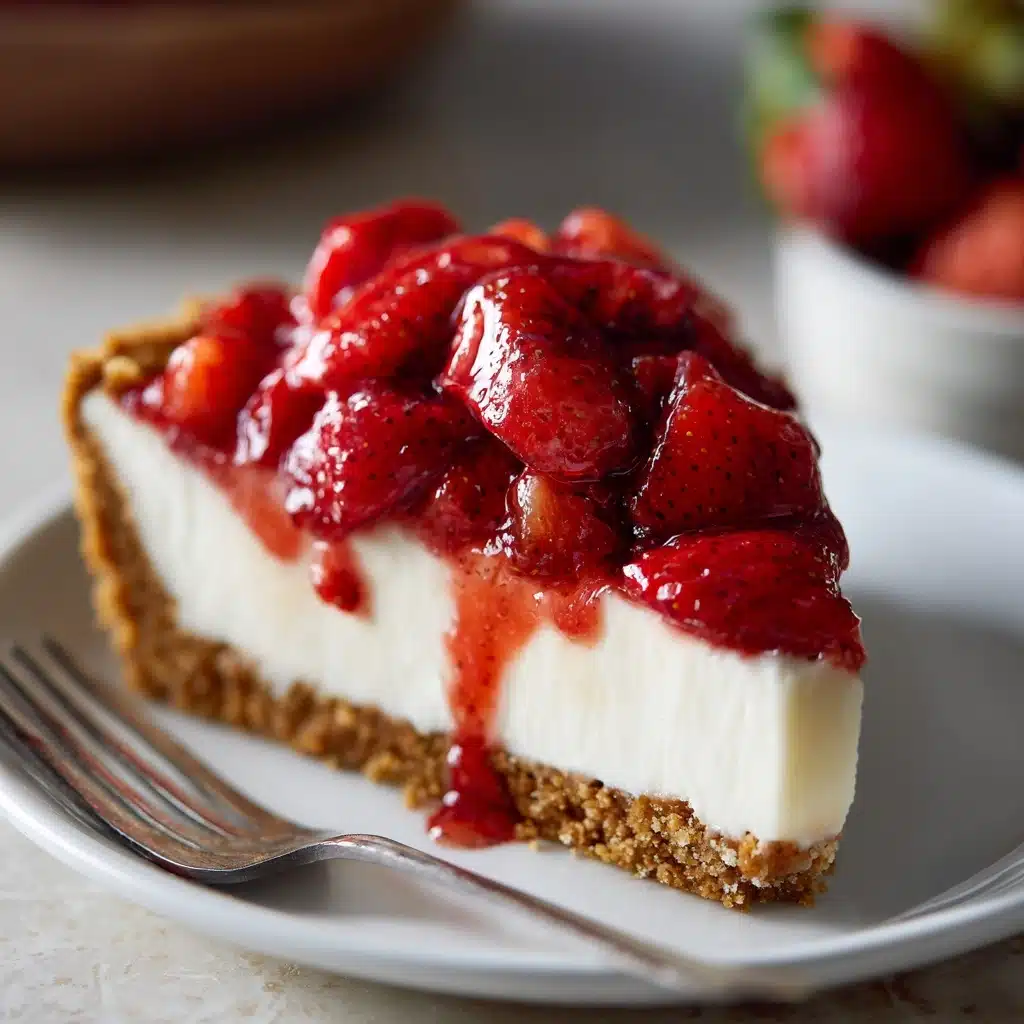
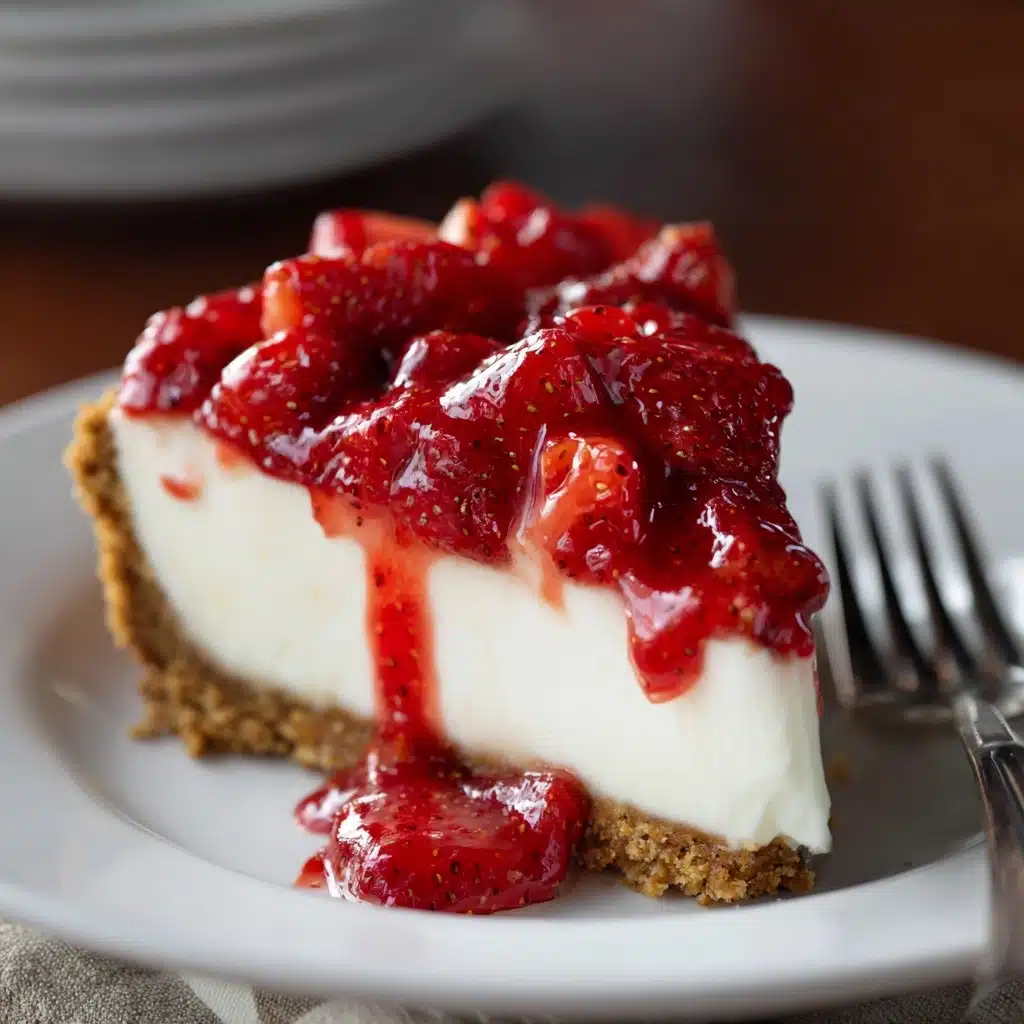
Strawberry Icebox Pie Recipe
If you’re on the hunt for a refreshing, melt-in-your-mouth dessert that’s bursting with fresh berry flavor and creamy texture, look no further than this delightful Strawberry Icebox Pie. This classic no-bake treat combines a crisp graham cracker crust with a luscious strawberry-studded filling, finished with a cloud of whipped cream and fresh berry garnish. It’s the perfect crowd-pleaser for those warm days when you want something sweet yet light, and it’s surprisingly simple to whip up. Every spoonful is a lovely balance of sweet, tangy, and creamy that feels like a hug from summer itself.
Ingredients You’ll Need
Each ingredient in this Strawberry Icebox Pie plays an essential role, coming together to deliver dreamy texture, fresh flavor, and a stunning look. The simplicity here is truly key — just a handful of well-chosen elements create a pie you’ll want to make again and again.
- Graham cracker crumbs: Provides a buttery, crunchy base that perfectly supports the creamy filling.
- Melted butter: Binds the crust together and adds that irresistibly rich mouthfeel.
- Granulated sugar: Adds just the right touch of sweetness to the crust for balance.
- Fresh sliced strawberries: The star of the show, bringing natural sweetness and vibrant color.
- Cream cheese (softened): Creates the silky, tangy backbone of the filling.
- Powdered sugar: Sweetens the filling and helps keep it smooth and creamy.
- Vanilla extract: Enhances the overall flavor with a warm, floral note.
- Heavy whipping cream: Whipped to fluffy peaks, it lightens the filling into pure decadence.
- Extra whipped cream and fresh strawberries (for topping): Adds an elegant, fresh finish that’s as pretty as it is tasty.
How to Make Strawberry Icebox Pie
Step 1: Prepare the crust
Start by mixing the graham cracker crumbs, melted butter, and sugar in a medium bowl. This trio comes together quickly to form the perfect crust base, full of buttery, sweet crunch. Press the mixture firmly into the bottom and sides of your pie dish to ensure it holds together nicely once chilled. Pop it into the fridge while you move on to the luscious filling.
Step 2: Make the filling
Whip the softened cream cheese in a large bowl until it becomes velvety smooth — this forms the creamy foundation. Slowly add the powdered sugar and vanilla extract, blending them in gently for a sweet, aromatic touch. In a separate bowl, whip the heavy cream until stiff peaks form, then carefully fold it into the cream cheese mixture to create a light, airy mousse that’s utterly dreamy.
Step 3: Combine the strawberries
Now the magic happens — fold the fresh sliced strawberries into the whipped filling. This gives a burst of juicy freshness throughout the pie, ensuring every bite has a little fruity surprise. Once combined, pour the filling evenly over your chilled crust and smooth the surface with a spatula for a beautiful, inviting finish.
Step 4: Chill and serve
Cover your pie tightly with plastic wrap and refrigerate it for at least 4 hours, or until the filling is set and firm. This chilling time is crucial as it allows the flavors to meld and the pie to reach that perfect icebox texture. When ready to serve, adorn the top with extra whipped cream and fresh strawberries for a show-stopping final touch.
How to Serve Strawberry Icebox Pie
Garnishes
Fresh, vibrant garnishes make all the difference with a Strawberry Icebox Pie. Pile on a cloud of freshly whipped cream and scatter halved or sliced strawberries on top for a gorgeous, inviting look that shouts summer celebration. A sprinkle of finely chopped mint or a dusting of powdered sugar can add that extra hint of freshness and visual appeal.
Side Dishes
This pie pairs beautifully with light, complementary sides. Think a crisp green salad with a citrus vinaigrette to balance the richness or a delicate scoop of lemon sorbet to keep the overall mood bright and refreshing. If you’re serving at a party, fresh fruit platters or a selection of mild cheeses also work wonderfully alongside.
Creative Ways to Present
If you want to put a twist on tradition, consider serving individual portions of Strawberry Icebox Pie in pretty dessert glasses or mason jars layered with crushed graham crackers and extra berries. Another fun idea is to prepare mini pies using tartlet pans for bite-sized treats that look as good as they taste. Ribboned strawberry slices threaded with mint leaves can also add an elegant flair.
Make Ahead and Storage
Storing Leftovers
Leftover Strawberry Icebox Pie is best kept refrigerated, tightly covered to prevent it from absorbing any odors. It will stay fresh and delicious for up to 3 days, though the earlier it’s enjoyed, the better the texture and flavor experience.
Freezing
You can freeze Strawberry Icebox Pie, but because it’s made with fresh fruit and whipped cream, the texture can change slightly after thawing and the strawberries may become a little watery. If you freeze it, wrap it tightly in plastic wrap and place it in an airtight container, then thaw slowly in the fridge before serving.
Reheating
This pie is best served chilled and not reheated. Warming it will cause the cream filling to lose its structure and the fresh strawberries to soften too much. Keep it cool and enjoy the refreshing, creamy texture straight from the fridge for the best experience.
FAQs
Can I use frozen strawberries for Strawberry Icebox Pie?
While fresh strawberries are preferred for their texture and flavor, you can use frozen strawberries if needed. Be sure to thaw and drain them well to avoid excess moisture that could make the pie soggy.
Is this Strawberry Icebox Pie gluten-free?
As the recipe calls for graham cracker crumbs, which typically contain gluten, it is not gluten-free in its original form. However, you can substitute with gluten-free graham crackers or digestive biscuits to make it safe for gluten-sensitive guests.
Can I make this pie vegan?
To make a vegan version, substitute the cream cheese and heavy cream with plant-based alternatives like vegan cream cheese and coconut cream. Keep in mind the taste and texture will vary slightly but it still makes a delightful dessert.
How long does it take for the pie to set?
Chilling for at least 4 hours is necessary for the filling to firm up properly. Overnight chilling is even better if you want a really solid and sliceable pie.
Can I add other fruits to the Strawberry Icebox Pie?
Absolutely! While strawberries are classic, mixing in blueberries, raspberries, or chopped peaches can add wonderful dimension and fun variation to this easy dessert.
Final Thoughts
There’s something truly special about a Strawberry Icebox Pie that makes it feel like a celebration in every bite. Its fresh flavors and creamy texture make it a go-to crowd-pleaser that’s easy to make and hard to resist. Whether you’re new to no-bake pies or a seasoned dessert lover, this recipe is a fantastic addition to your repertoire. I can’t wait for you to try it and fall in love with this charming slice of summer!
Print
Strawberry Icebox Pie Recipe
- Total Time: 4 hours 20 minutes
- Yield: 8 servings 1x
- Diet: Vegetarian
Description
This refreshing Strawberry Icebox Pie features a crisp graham cracker crust filled with a smooth, creamy mixture of cream cheese, whipped cream, and fresh strawberries. Perfectly chilled to set, this no-bake dessert is topped with extra whipped cream and fresh strawberries, making it an ideal sweet treat for warm weather or any occasion.
Ingredients
Crust
- 1 ½ cups graham cracker crumbs
- ½ cup melted butter
- ¼ cup granulated sugar
Filling
- 2 cups sliced fresh strawberries
- 8 oz cream cheese, softened
- 1 cup powdered sugar
- 1 teaspoon vanilla extract
- 1 cup heavy whipping cream
Topping
- Extra whipped cream
- Fresh strawberries for garnish
Instructions
- Prepare the crust: In a medium bowl, combine the graham cracker crumbs, melted butter, and granulated sugar, mixing until well blended. Press this mixture firmly into the bottom and up the sides of a pie dish. Refrigerate the crust while you prepare the filling.
- Make the filling: Beat the softened cream cheese in a large bowl until smooth and creamy. Gradually add the powdered sugar and vanilla extract, mixing thoroughly. In a separate bowl, whip the heavy cream until stiff peaks form, then gently fold the whipped cream into the cream cheese mixture to keep it light and airy.
- Combine and layer: Carefully fold the sliced strawberries into the creamy filling, distributing them evenly. Pour the combined filling into the chilled crust and smooth the top with a spatula.
- Chill and serve: Cover the pie with plastic wrap and refrigerate for at least 4 hours or until the pie is firm and set. Before serving, top with extra whipped cream and garnish with fresh strawberries for an attractive and delicious finish.
Notes
- For best flavor, use fresh ripe strawberries.
- Make sure the cream cheese is fully softened to avoid lumps in the filling.
- Chilling time is crucial for the pie to set properly; avoid shortening it.
- You can substitute graham crackers with digestive biscuits if desired.
- This pie is best consumed within 2 days of preparation for optimal freshness.
- Prep Time: 20 minutes
- Cook Time: 0 minutes
- Category: Dessert
- Method: No-Bake, Chilling
- Cuisine: American
Nutrition
- Serving Size: 1 slice (1/8 of pie)
- Calories: 320
- Sugar: 22g
- Sodium: 180mg
- Fat: 22g
- Saturated Fat: 13g
- Unsaturated Fat: 7g
- Trans Fat: 0.5g
- Carbohydrates: 26g
- Fiber: 2g
- Protein: 4g
- Cholesterol: 70mg
Keywords: Strawberry Icebox Pie, no bake pie, summer dessert, graham cracker crust, cream cheese pie, fresh strawberry dessert


