Description
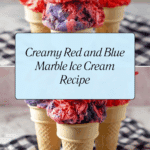
This vibrant Red and Blue Ice Cream recipe combines a creamy coconut-flavored base with sweetened condensed milk, accented by red and blue food gel swirls for a stunning marbled effect. Perfect for summer parties or festive occasions, this no-churn ice cream is easy to prepare, requiring only a stand mixer and freezer to create a visually delightful and delicious treat.
Ingredients
Scale
Ice Cream Base
- 4 cups heavy whipping cream
- 1 (14 oz) can sweetened condensed milk
- 3 tablespoons coconut extract
Color & Decoration
- 1 small tub of white icing
- 10 drops red food gel
- 2 drops blue food gel
To Serve
- Ice cream cones
Instructions
- Whip the Cream: Place the heavy whipping cream and coconut extract into a stand mixer fitted with a whisk attachment. Start whipping on low speed for 4 minutes, then gradually increase to speed 6. Continue whisking until the cream thickens and resembles a fluffy whipped topping, which takes about 10 minutes.
- Incorporate Sweetened Condensed Milk and Red Coloring: Gently fold in the can of sweetened condensed milk along with 10 drops of red food gel into the whipped cream. Adjust the amount of red gel to achieve your desired shade. Pour half of this red mixture evenly into a 9×9 inch square pan.
- Prepare Blue Swirls: Mix 2 drops of blue food gel into the white icing until evenly colored. Drop spoonfuls of the blue icing onto the red ice cream layer in various spots without stirring to prevent purple color formation. Alternate layering by adding more red ice cream mix and blue icing drops on top to build a marbled pattern.
- Freeze the Ice Cream: Cover the pan and place it in the freezer for at least 6 hours, preferably overnight, to allow the ice cream to fully set and develop the marbled visual effect when scooped.
- Serve: Once frozen solid, scoop the ice cream into cones and serve immediately for a colorful and creamy dessert experience.
Notes
- Use a stand mixer with a whisk attachment for best and quickest results; a hand mixer can be used but will take longer to whip the cream.
- Do not stir after adding blue icing to the red mixture to maintain a vibrant marbled look instead of a uniform purple color.
- The ice cream needs to freeze at least 6 hours for proper texture; longer freezing (overnight) is recommended.
- Adjust the number of food gel drops according to your desired color intensity.
- For a dairy-free option, heavy cream and condensed milk substitutions would be necessary.
- Prep Time: 15 minutes
- Cook Time: 0 minutes
- Category: Dessert
- Method: No-Cook
- Cuisine: American
Keywords: Red and Blue Ice Cream, no churn ice cream, coconut ice cream, marbled ice cream, easy homemade ice cream, summer dessert