Homemade Garlic Knots Recipe
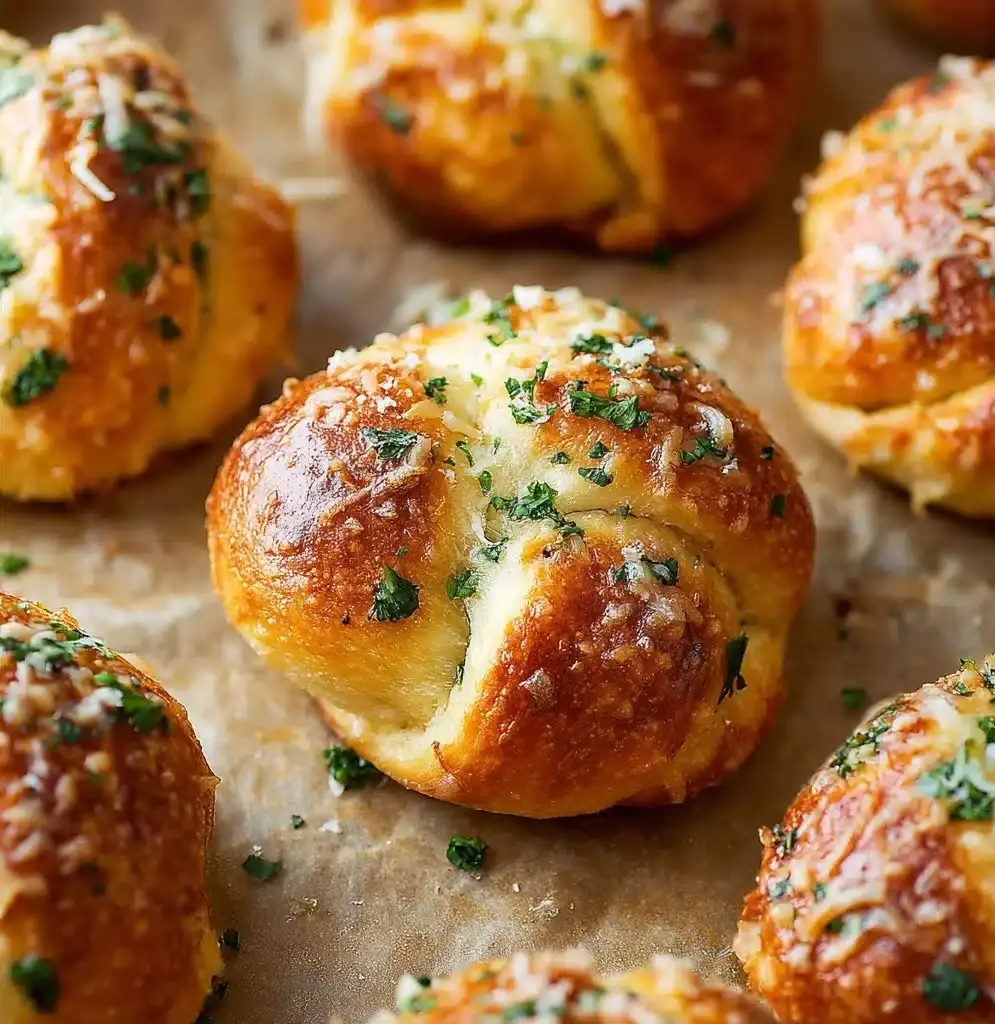
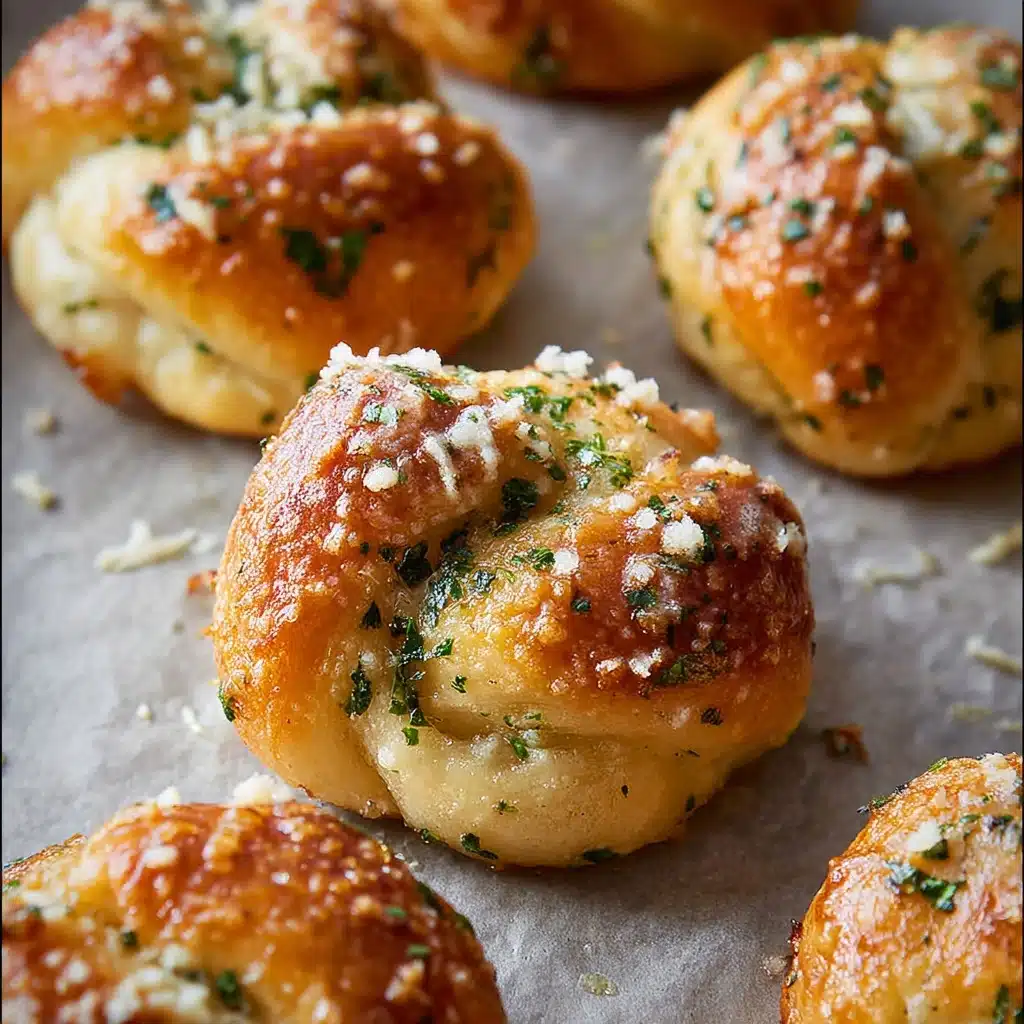
Homemade Garlic Knots are the kind of oven-fresh, garlicky treats that turn any meal into something a little bit magical. Each knot is golden and pillowy, brushed with rich garlic butter, sprinkled with cheese, and scattered with fragrant parsley. These are the ultimate way to make your kitchen smell amazing and your dinner guests’ eyes light up. Whether you’re serving them as an appetizer, a casual snack, or a perfect companion to a hearty pasta, this recipe guarantees soft, fluffy knots with that addictive garlic punch. If you love warm, bakery-style bread at home, get ready for Homemade Garlic Knots to become your new go-to baking obsession!
Ingredients You’ll Need
Ingredients You’ll Need
Gathering just a handful of pantry staples unlocks everything you need for unforgettable flavor and bakery-style texture. Every ingredient in these Homemade Garlic Knots plays a delicious role, from a strong dough to a butter-garlic finish that takes things over the top.
- Bread flour: Gives the knots their chewy, airy texture and classic “pull apart” crumb.
- Granulated sugar: Just a pinch to lightly sweeten the dough and help activate the yeast.
- Active dry yeast: This is what makes your knots rise sky-high and bake up pillow-soft.
- Salt: Brings all the flavors together and helps balance the richness of butter and garlic.
- Warm water (110–115°F): The perfect temperature to activate the yeast without killing it—think cozy, not hot!
- Olive oil: Just a bit adds a subtle savory note to the dough, with more for greasing to keep things from sticking.
- Unsalted butter: The base for that unbeatably rich garlic coating—don’t skimp!
- Fresh garlic, minced: Six cloves means you get deep, punchy flavor in every bite.
- Fresh parsley, minced: For bright, herby flecks that add color and freshness.
- Garlic salt or garlic powder: The extra bump of garlicky flavor that everyone craves.
- Parmesan cheese, finely grated: Finishes each knot with a salty-savory kick and a hint of melt.
How to Make Homemade Garlic Knots
Step 1: Make and Mix the Dough
Start by adding the bread flour, granulated sugar, active dry yeast, and salt to the bowl of your stand mixer. Gently whisk these together to ensure even distribution—this small step helps guarantee a uniform texture in every bite. With the mixer running on low and fitted with a dough hook, slowly pour in your warm water (aim for that cozy, not-hot temperature!) and two tablespoons of olive oil. Beat until the mixture comes together in a ball. If it feels too sticky, sprinkle in a bit more flour; if it’s dry, a splash more water will do the trick. You’re looking for a smooth, elastic dough that can just barely be handled without sticking everywhere.
Step 2: Knead and First Rise
Transfer the dough onto a lightly floured surface and gently knead it by hand, shaping it into a smooth, firm ball—it should feel supple and just a bit springy under your hands! Grab a large bowl, grease it well with two teaspoons olive oil, and place your dough inside. Cover the bowl tightly with plastic wrap and set it somewhere warm (like your oven with just the light on) to rise for 90 minutes. The dough should swell and double in size, turning pillowy and puffy.
Step 3: Divide and Rest
Once your dough is beautifully risen, place it back on a lightly floured work surface and cut it into two equal halves. Lay each portion on plastic wrap, relax for 10 minutes (both you and the dough!), which lets the gluten relax and makes shaping easier in the next step.
Step 4: Shape into Knots
Lightly dust the rounds with flour, then use a sharp knife to cut each into four quarters. Press each quarter into a rough rectangle, slice in half again, and you’ll have 16 small pieces ready for knotting. Dust each piece lightly with flour, roll into a rope about eight inches long, and tie gently into a knot. There’s no need to be strict—their rustic, unique look is part of the charm! Arrange your knots on a parchment-lined baking sheet, cover loosely with plastic wrap, and let them rest for about 30 minutes. This final nap allows them to rise just a little more, giving you fluffy results.
Step 5: Bake the Knots
Preheat your oven to 450°F. If you like, lightly brush the knots with the garlic butter before they go in for an extra layer of flavor. Bake in the center of the oven for around 20 minutes, or until they turn golden brown and are firm to the touch. The smell alone will make you want to eat them immediately!
Step 6: Make the Garlic Coating
While the knots bake, melt the unsalted butter in a small saucepan over medium-low heat. Stir in your minced garlic and let it simmer gently until fragrant, just a minute or two. Be careful not to brown the garlic—it should stay golden and soft. Add in your fresh parsley and garlic salt or powder, stirring to combine. Taste and adjust for salt if needed, and then set the pan aside until the knots are ready for their finishing touch.
Step 7: Brush, Sprinkle, and Serve
As soon as the Homemade Garlic Knots are out of the oven, let them cool for about five minutes (just enough to handle). Next, brush them generously with your buttery, garlicky coating, making sure each crevice soaks it up. Sprinkle the knots with finely grated Parmesan, and don’t wait too long—these beauties are best served warm and fragrant!
How to Serve Homemade Garlic Knots
Garnishes
For irresistible presentation and flavor, top your warm Homemade Garlic Knots with a final scattering of freshly chopped parsley and a big pinch of extra Parmesan. If you love a little kick, try a sprinkle of crushed red pepper flakes. These finishing touches add beautiful color and an extra layer of flavor that makes each knot truly craveable.
Side Dishes
Homemade Garlic Knots are marvelous alongside almost any Italian meal. Pair them with a bowl of rustic tomato soup, your favorite pasta with red sauce, or a big leafy salad tossed with lemony vinaigrette. They’re fantastic with roasted chicken and make an ideal side to saucy dishes like chicken parmesan or baked ziti—perfect for soaking up every last drop of sauce!
Creative Ways to Present
Dress up your Homemade Garlic Knots for parties by arranging them in a basket lined with a red-checked cloth or stacking them in a bread bowl for a statement centerpiece. For sharing, thread them onto wooden skewers as a fun, interactive party snack. You can even top each with a different cheese or herb for a playful twist—a guaranteed conversation starter!
Make Ahead and Storage
Storing Leftovers
If you have any Homemade Garlic Knots left (which is rare!), let them cool completely before sealing them in an airtight container or a zip-top bag. They’ll stay soft for up to two days at room temperature. To keep them even fresher, line the container with a paper towel to soak up excess moisture and prevent sogginess.
Freezing
Yes, you can absolutely freeze these knots! Once cooled, arrange your Homemade Garlic Knots in a single layer on a baking sheet and freeze until solid, then transfer to a freezer bag. They keep beautifully for up to two months—just remember to squeeze out as much air as possible to fend off freezer burn.
Reheating
To revive that just-baked magic, warm your Homemade Garlic Knots in a 350°F oven for 8–10 minutes straight from the fridge, or about 15 minutes from frozen. If you like, brush them with a little extra garlic butter before reheating. This step restores both softness and their swoon-worthy aroma!
FAQs
Can I use all-purpose flour instead of bread flour?
Yes, all-purpose flour will work in place of bread flour if that’s what you have on hand, but the texture might be slightly less chewy. Bread flour has higher protein, which straight-up gives Homemade Garlic Knots their signature softness and pull.
What if I don’t have a stand mixer?
No mixer? No problem! You can mix the dough with a sturdy spoon and knead by hand—it may take a little extra effort, but consider it a mini workout with a tasty reward at the end.
Can I make the dough in advance?
Absolutely! Prepare the dough up to the first rise, then cover and refrigerate overnight. The next day, let it come to room temperature, then shape and bake as directed. The flavors develop even more with an overnight rest.
How do I make vegan Homemade Garlic Knots?
To make them dairy-free, simply substitute plant-based butter for regular butter and use your favorite vegan Parmesan-style cheese or skip the cheese entirely. Double-check your bread flour is vegan-friendly, and enjoy!
Why did my knots come out dense?
Dense knots are usually a sign the dough didn’t rise long enough or the yeast wasn’t fully activated. Make sure your water is the right temperature and give the dough plenty of cozy, warm time to rise until doubled for best results.
Final Thoughts
There’s a certain joy in pulling apart a batch of Homemade Garlic Knots fresh from the oven—the smell, the look, the taste, all of it is so completely satisfying. Don’t be surprised if they disappear faster than you anticipate! Whip up a batch, savor every garlicky bite, and watch how quickly this becomes everyone’s most requested side. Enjoy!
Print
Homemade Garlic Knots Recipe
- Total Time: 2 hours
- Yield: 16 knots 1x
- Diet: Vegetarian
Description
Learn how to make delicious Homemade Garlic Knots from scratch with this easy-to-follow recipe. These garlic-infused knots are perfect for sharing with family and friends!
Ingredients
Dough:
- 3 and 3/4 cups bread flour
- 1 and 1/2 teaspoons granulated sugar
- 1 envelope active dry yeast
- 2 teaspoons salt
- 1 and 1/2 cups warm water, 110 – 115 degrees (F)
- 2 tablespoons plus 2 teaspoons olive oil (divided)
Garlic Coating:
- 1/2 cup (113g) unsalted butter
- 6 cloves garlic (minced)
- 1/3 cup fresh parsley, minced
- 1 and 1/2 teaspoons garlic salt or garlic powder
- 1/3 cup Parmesan cheese (finely grated)
Instructions
- For the dough: In the bowl of a stand mixer fitted with the dough hook, combine bread flour, sugar, yeast, and salt. Add warm water and 2 tablespoons of olive oil. Mix until a ball of dough forms.
- Turn out the dough, knead it, and let it rise.
- Divide the dough, shape it into knots, and let them rise again.
- Preheat oven, bake the knots until golden brown.
- Cool slightly, then brush with garlic coating, sprinkle with cheese, and serve warm.
- For the garlic coating: Melt butter, sauté garlic, add parsley and garlic salt, then set aside.
- Prep Time: 30 minutes
- Cook Time: 20 minutes
- Category: Appetizer
- Method: Baking
- Cuisine: Italian
Nutrition
- Serving Size: 1 garlic knot
- Calories: 180
- Sugar: 1g
- Sodium: 350mg
- Fat: 8g
- Saturated Fat: 4g
- Unsaturated Fat: 3g
- Trans Fat: 0g
- Carbohydrates: 24g
- Fiber: 1g
- Protein: 4g
- Cholesterol: 15mg
Keywords: Garlic Knots, Homemade, Bread, Appetizer, Italian

